Chapter 6 Deployment
6.1 RStudio Connect
It doesn’t matter how great your analysis is unless you can explain it to others: you need to communicate your results. - Grolemund & Wickham in R For Data Science
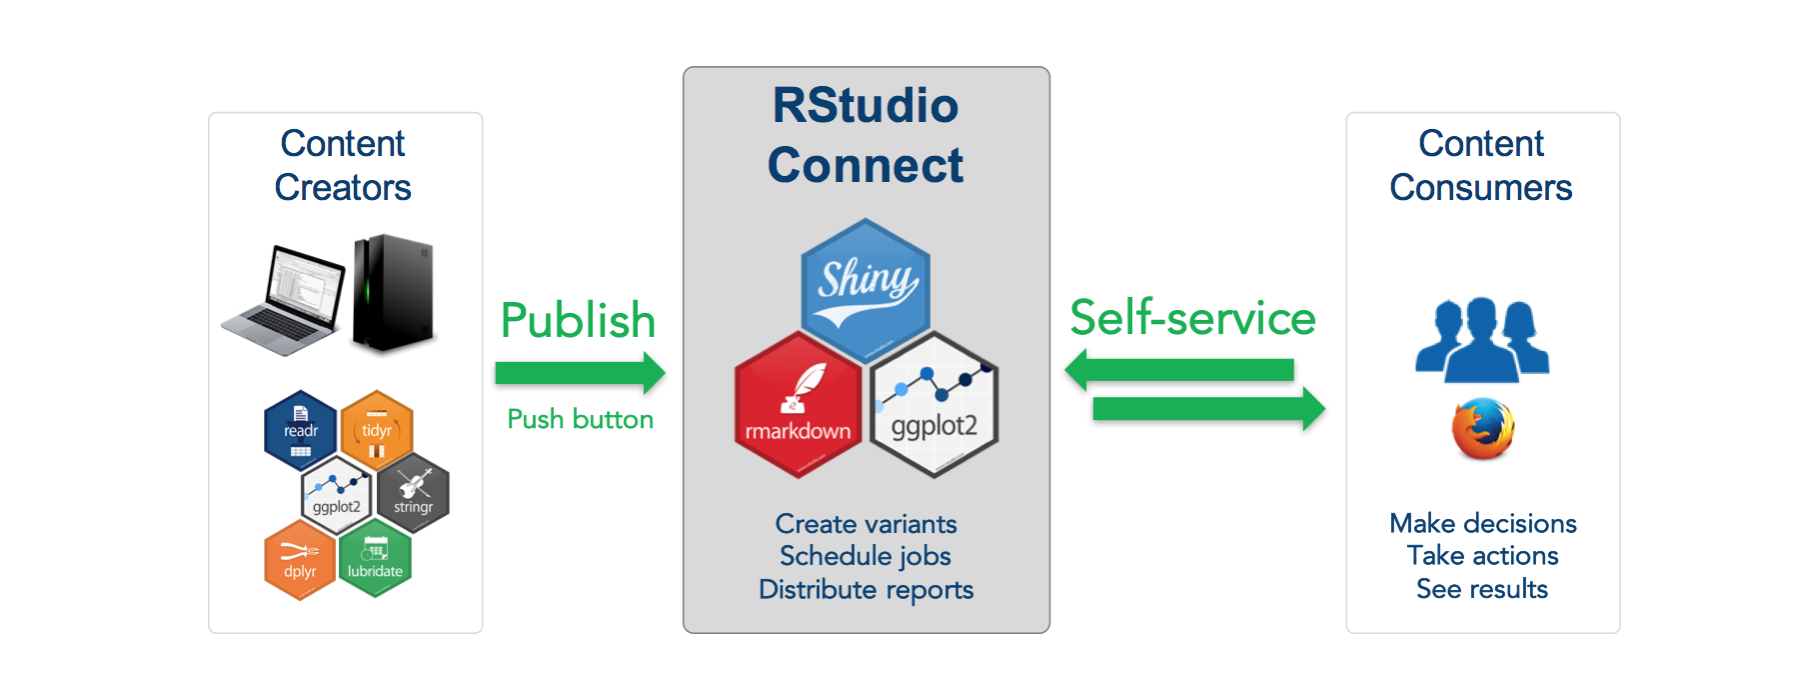
RStudio Connect connects you and the work you do in R with others as never before. Only RStudio Connect provides:
- “One button” deployment for any Shiny application, R Markdown document, or any static plot or graph to a single environment.
- The ability to manage and limit access to the work you’ve shared with others - and easily see the work they’ve shared with you.
- “Hands free” scheduling of updates to your documents and automatic email distribution.
RStudio Professional Quickstart (VirtualBox VM Download - Available Jan. 20)
RStudio Connect
- User Guide: Connecting
- User Guide: Publishing
6.2 Activity: Inital Deployment
First: Login to RStudio Connect
Discussion:
Pre-deployment Brainstorm
- What is our goal in deploying this code?
- What does our code depend on locally?
- What needs to deploy with our code?
Deliverable: Deployed App
Press the publish button in RStudio:
- Link to your Connect account
- Select the files to publish (do NOT use the default to publish all the files)
- Poke around at the results
Note: We are expecting an error!
6.3 Application Settings
6.3.1 Access
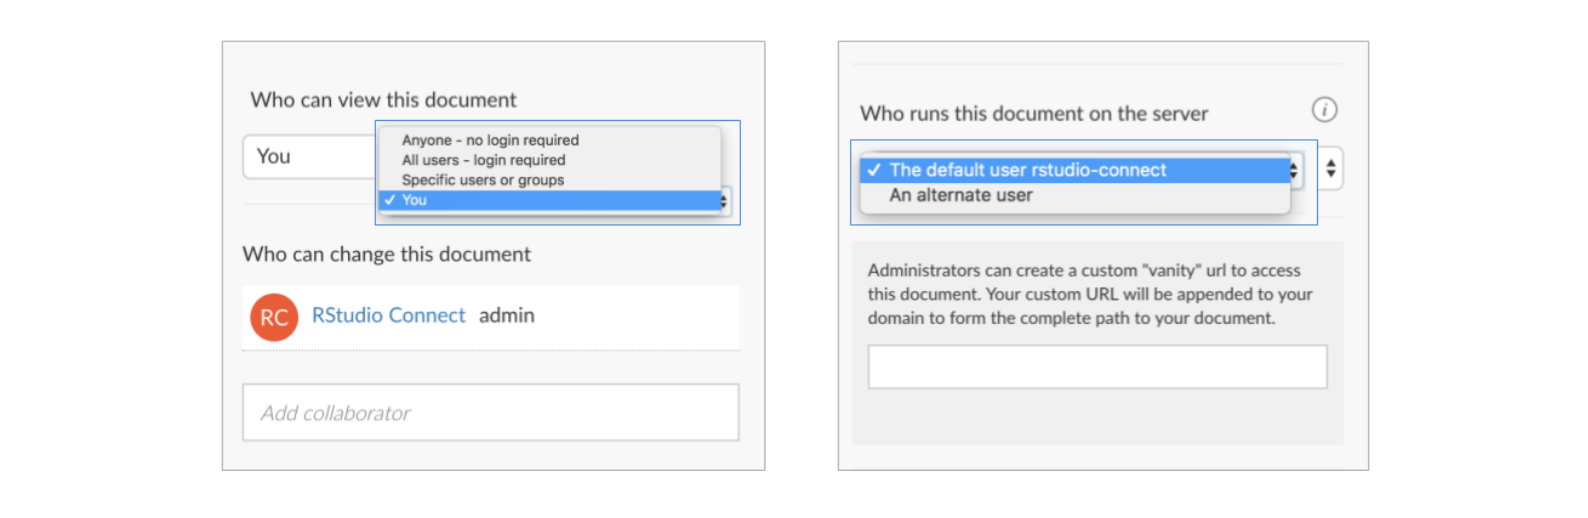
After publishing a piece of content to RStudio Connect, the Connect user interface will open to show the access panel.
Access Settings Options
There are three types of user interaction settings available to publishers in this panel:
- Viewer Access (who can see this content)
- Collaborator Access (who can change this content)
- Execution User (which server user will run the content)
The final setting for creating a vanity URL is reserved for administrators only.
6.3.2 Metadata
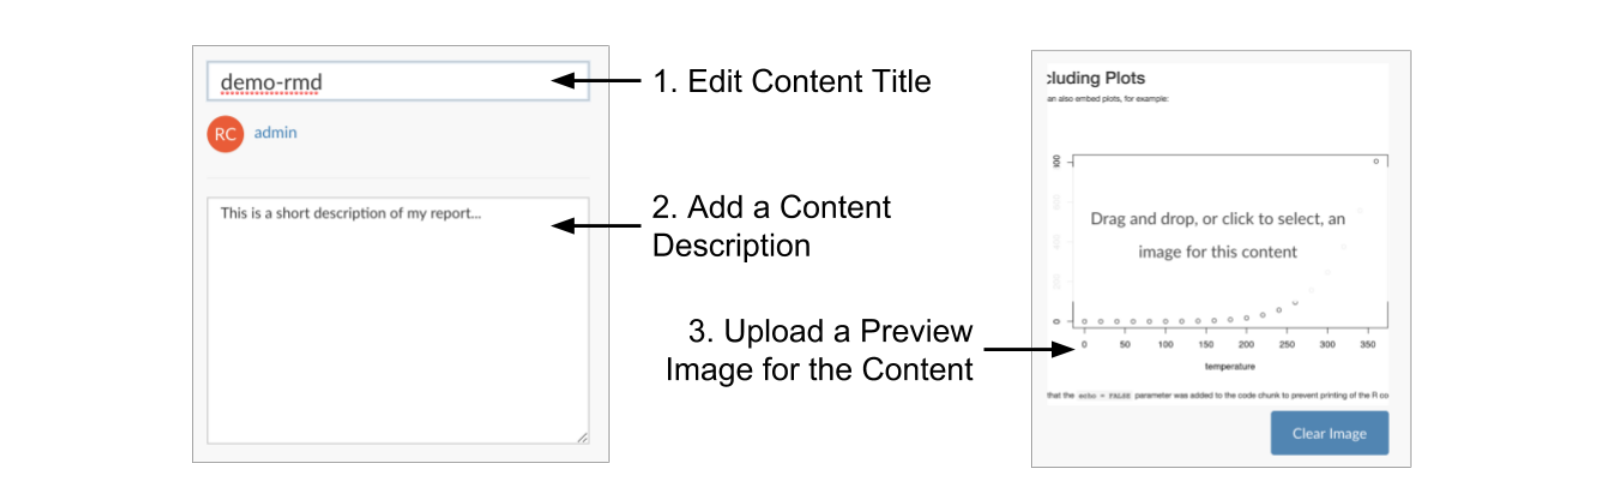
After your RStudio Connect content has been published, you can change its title, add a description, and upload a content image to make it easier for others to find your content. First, open the content and click on the “info” tab.
Metadata and Info Settings
The top text field is the application title. This defaults to the application name if it was given. Other users will not be able to edit this field unless they are collaborators or administrators. The second, larger text area is the application description. You can describe the content in this field, or add other information that you feel is important. Other users will not be able to edit this field unless they are collaborators or administrators.
The area that displays a prompt to select an image for this content is the content image field. You can upload a jpeg, png, gif, or svg image that represents the content. Unlike title or description, users who cannot view the content (including administrators) will also be unable to view the image you have uploaded. This way, if you wish to upload a screenshot of the content, any information contained in that screenshot will not leak to users who would not otherwise be able to access it.
6.3.3 Logs
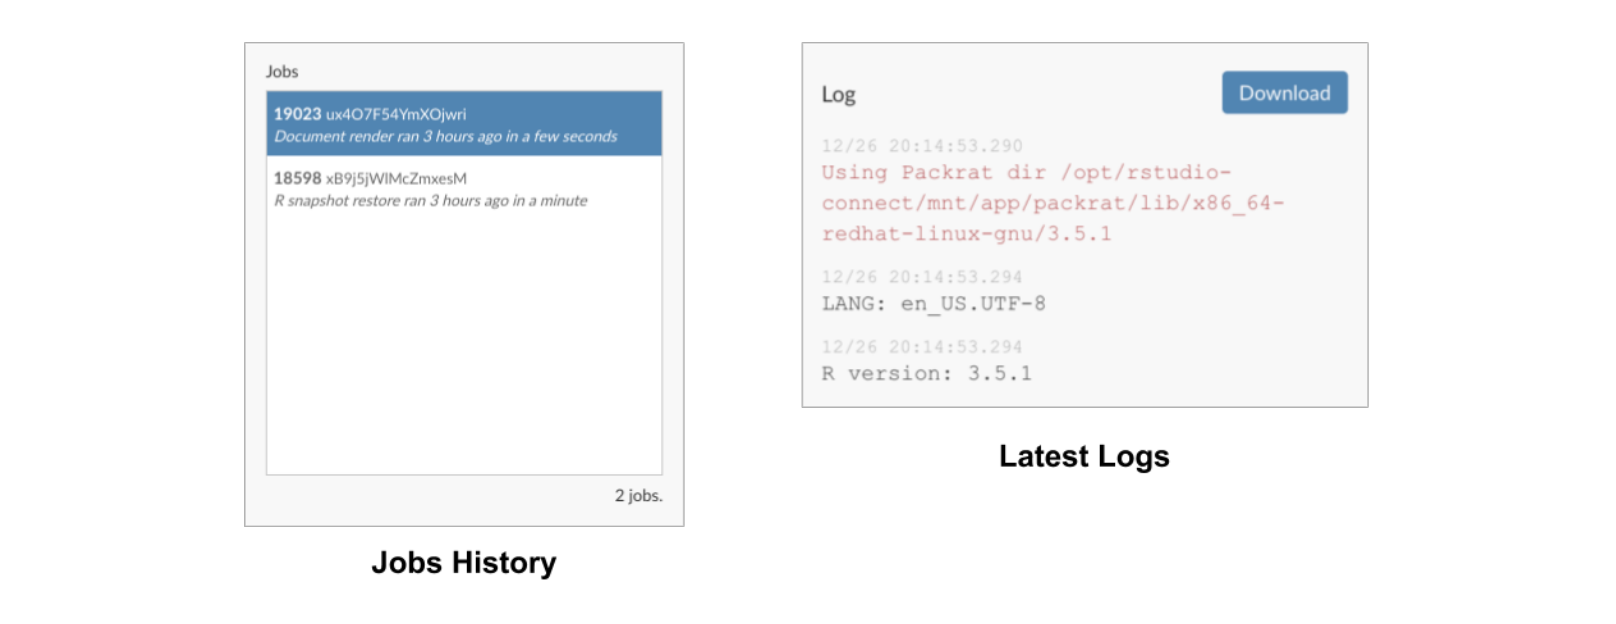
The logs panel allows you to view a history of jobs and snapshots as well as view and download the latest content logs. Content logs can be especially useful for debugging a failed deployment or unexpected behavior.
Application Logs